Visual tools - Making learning material at home
Remember in school how we would
learn a paragraph of history (or any other subject for that matter) - some might
pace around the room reciting out loud, some would make notes of every topic. Different
people have different learning styles. This is true with children with autism
as well. The learning styles in autism are not the same as that of NT kids.
Though this may not be a rule but children with autism are mostly visual
learners. This means they learn easily by seeing or through pictures. The
general education system still relies heavily on the auditory learning methods.
i.e giving lectures, or verbal instructions. Even educators who are not trained
in autism may not incorporate adjustments in their teaching strategies to accommodate
the learning styles of autistic children. This auditory learning technique may
not be best suited for autistic children. It may greatly benefit, to include
some visual teaching material, and visual cues in classroom teaching as well as
working with the child at home. Visual supports can also greatly help children
who are non verbal or do not have good receptive skills. I regularly make some
of these visual teaching materials to work with my daughter at home, reason for
doing so being that it is cheaper and can be customized according to the needs
and level of your child. Some of the teaching materials that can be used while
working with children with autism are
- Flash Cards: I find flash cards very useful in almost
all areas of learning; matching, identification. concepts etc. Even with
the availability of technological advanced visual tools like ipad, i still
think flash cards are a good option. using them as a teaching tool, i have
seen Tuhina improve leaps and bounds in her matching, identification,
scanning and concept building skills. Flash cards can be easily made at
home. When Tuhina started out, i realized that she could not easily
identify that thecards or pictures available in the market as they were not very close to the real object. In the beginning I would use picture of actual objects in her environment to teach her object identification and later on moved towards generalizing. Now, I take print outs of pictures from internet or use picture books from the market. I still use realistic pictures as it may be difficult for children to associate with animated pictures (like cartoon dog or kite with eyes)While making flash cards at home I followed the following points
- Initially use the pictures of actual objects readily seen in the environment.
- Keep the card size big and later on reduced the size when her scanning and focus improved.
- Keep the size and shape of all cards identical.
- Laminating the cards was a good idea. it improves the durability. I just pasted the picture on a chart paper sheet and covered with a transparent white tape.
- Add the name of the object in the picture (in small but clear block letters). This will help in building sight reading skills.
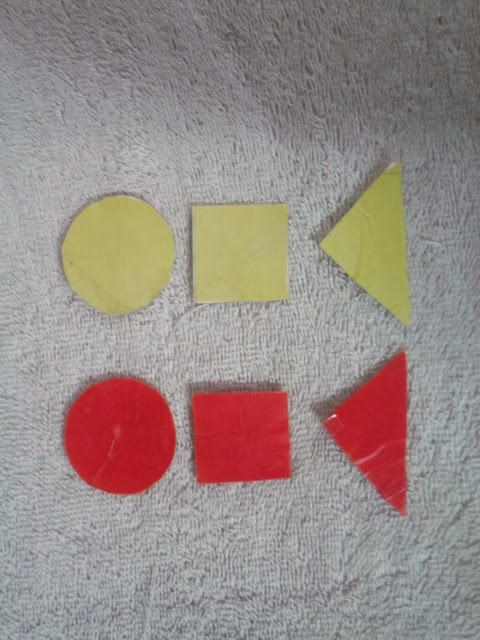 |
| Cards for Shapes |
 |
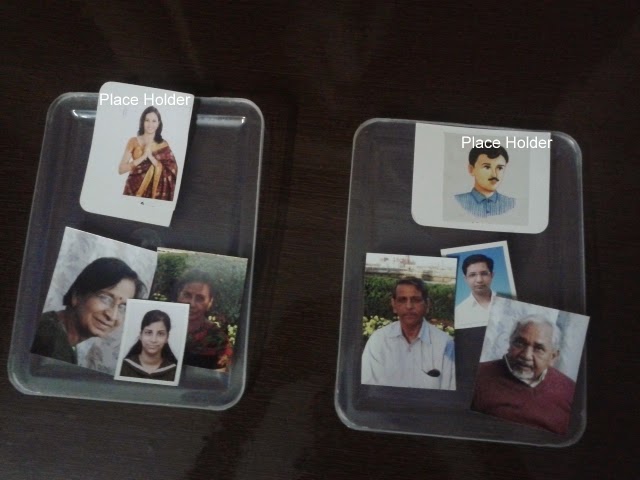
- communication book: A communication book was the first tool which help me bridge a communication gap with my daughter. It helped her make a choice, among the various options presented and communicate the same to me. I started out with 2 pictures at a time. A communication board, which can be displayed in clear view (like a wall) is easier to use at home as many children might face difficulty manipulating the pages of book. But the book is easier to carry and useful outdoors. I doubled it as a choice board by placing 2 pictures on a page and asking her to make a choice of what she wants. For making a communication book, I followed the following steps:
 |
| Cards for concept big/small |
 | |
| Color cards |
·
take a hard bound file folder and
cut it to a size which could be carried in a bag.
·
Cut a few A4 sheet to size of folder
and laminate them (carefully pasting thick transparent tape on both sides). Also
laminate the pictures to be used.
·
Paste Velcro to the sheets and to
the backside of pictures. After many failures of trying to keep the Velcro in
place using different glues, I finally found a Velcro with self adhesive, which
I get from an autism therapy center nearby. It works great.
·
I would put 2 pictures in a page and
make sure to have those thing available without delay after the choice was
made.
- Visual Schedules: Children with autism work well in a structured schedule. A visual schedule prepares them for transitions throughout the day and sets the expectation of what comes next. I did make a visual schedule and tried it with Tuhi at home but could not carry on with it with the unpredictable home environment :) (however it is being followed at school). But then Tuhi does not have much problems adjusting to changes in schedule. Although it make greatly help children for whom transitions are difficult. Also, it helps a lot in independent functioning of the children. A visual schedule is of three types – a). object schedule b). picture schedule c). word schedule. It would depend on the level of the child for the type of schedule to be used. It can be made as follows –
·
Take a cardboard strip and put
objects associated with, or pictures of activities using velcro.
·
Put the child’s picture on the
schedule
·
At the end of the cardboard strip,
make a pocket to hold the transition card.
·
A transition card is a card (preferably
with the child’s pic), which cues the child to check schedule. Make many of
these.
·
Make chart paper pockets in
different areas of your home, (e.g near wash basin for brushing) to hold the
schedule pictures/ object/word cards.
Apart
from these visual aids which can be made at home, ipads or smart phones also
are very useful for our kids. Most kids are interested in ipads and learn a lot
from the various autism apps available now. Tuhina is extremely interested in
music and watches videos on my phone. She learned pointing for playing the
video on the touch screen phone.
It
came as a pleasant surprise for me for all that Tuhina could learn, when the
teaching and communicating method was changed to visual. Our kids are smart,
may be not in the traditional sense, but they have strengths of their own. Using
and building up on their strengths and changing the teaching method to accommodate their style can greatly improve thier learning potential and do wonders for them.
Comments
Post a Comment